Plastic Extrusion attachment information
Step 1
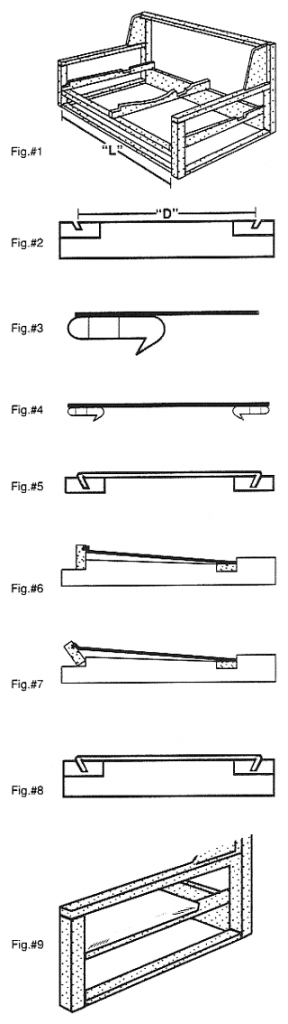
Modify stretch rails to provide notches for front and rear rails to anchor – Figure 1.
Step 2
Cut rails to length (L), include a saw cut 1/8″ wide, 9/16″ deep at 30 degrees running the length of both rails – Figure 2.
Width of Dymetrol® is determined as follows:
- Measure distance “D” Figure 2.
- Multiply “D” x 0.95 = width of Dymetrol®. (Allows for 5% stretch)
- Be certain that the black monofilament is installed so it runs from the front to the rear rail and is on the underside of the deck.
Step 3
Using a high quality monofilament thread (Bleding, Nymo, size “D” or equivalent,) sew the Dymetrol® suspension to the plastic extrusion (Part # D1195) using a double sew line – Figures 3 and 4.
Step 4
Insert extrusion, with Dymetrol® attached into saw cut – tapping slightly to set in place – Figure 5.
Step 5
Place rear rails into notches in the stretch rail and fasten in place (screws or staples) – Figure 6.
Step 6
Stand front rail into stretch rail notches – Figure 7.
Step 7
Use pneumatic stretching device to rotate front rail to a horizontal position, this will create the required 5% stretch in the fabric – Figure 8.
Step 8
Pull Dymetrol® snug over sides and staple in place – Figure 9.