Step 1
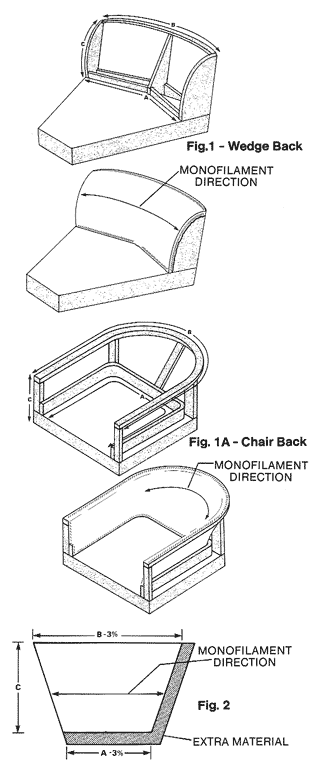
Measure the inside circumference of A and B and the length of line C as shown in Figures 1 and 1A.
Step 2
Lay out the Dymetrol® as shown in Figure 2. Note that the length of A and B is 3% shorter than the distances measured in Step 1. This will result in the required amount of stretch when installed.
Cut the Dymetrol® approximately 3″ longer than the lengths calculated above. This extra material (Figure 2) will be necessary only as an aid in the development of the first pattern for cutting multiple pieces of Dymetrol®.
Step 3
Attach the fabric along one end of the back (Line C in Figures 1 and 1A). Stretch the fabric with the appropriate stretching tool and attach the opposite end.
Step 4
Attach the fabric along the bottom rail line “A” as shown in Figures 1 and 1A.
Step 5
Pull fabric by hand and staple along top rail “B” in Figure 1 and 1A. Pulling the Dymetrol® in the non-stretch direction causes it to take the shape of the end stumps along the entire back.
Prior to installation, break all sharp edges where Dymetrol® will come into contact with the frame. Use recommended staple and staple pattern. Refer to Bulletin No. 1 (H-04610).
A proper installation will have the monofilaments running parallel with the top and the bottom rails.
To duplicate an installation on a production basis simply layer the Dymetrol® and pattern out using conventional fabric cutting equipment.